Peacekeeper Duster
by fallenstar, with a heck of a lot of help from maleficia
disclaimer, blah, blah, intended only for research purposes and I'm not trying to infringe on anyone's copyright, I'm just a fan. But it IS all my own work, so no stealing, okay?


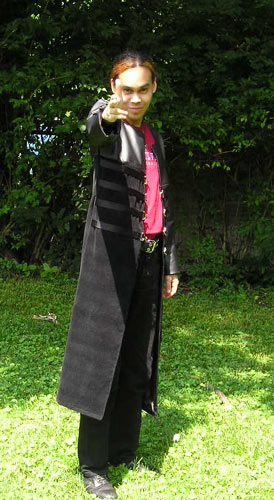
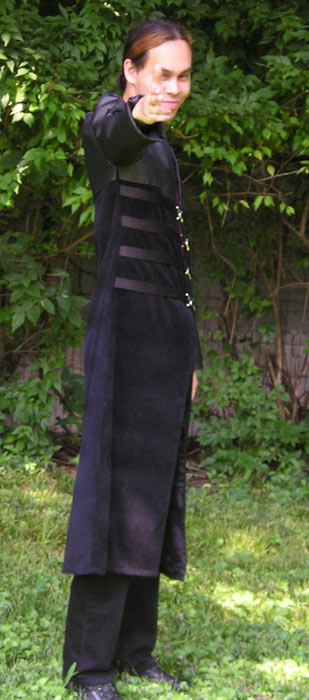
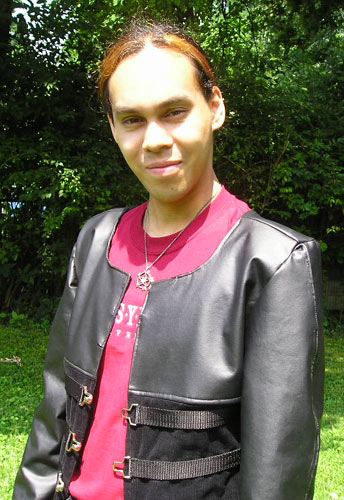
This is one of the main reference images, one of the better close-up screencaps that we used for the duster. In this photo, it kind of looks like there's a diagonal pattern in the leather top, but we couldn't find enough detail in any of the photos to actually reproduce it. It does show, though, the topstitching (we topstitched instead of using piping) around the collar and at the part where the leather top joins the cloth bottom.


Pattern: Vogue 7860, view C

There are probably easier patterns out there that we could have used, but, well, that's no fun, is it? This one needed a minimum of modification, which I'll try to explain:
--First of all, it's got princess seams. They're the curvy seams on the sides that give it a nice shapely look, which is fine if you're making a coat for a woman, but we weren't. The easiest fix was to draft them out by putting the pattern pieces for the front and side panels together and cutting them out as one piece. The jacket isn't extremely fitted, so we could get away with it.
--There are also small darts around the neck, which we also just did away with, and likewise for the faux-pockets.
--Also because the jacket's designed for a woman, it curves out at the hips and back in close to the bottom. We did a little creative work with newspaper and extended the line that goes out from the hip past the curve at an angle, to give it more flow at the bottom. (Basically, get a yardstick, lay it out on the pattern so it looks good, and draw a line right from the waist following the hip curve but not curving back inward as you go towards the bottom.)
--we added about six inches to the length at the bottom, which is easy to do with newspaper, or just careful measuring while you're cutting.
--This is where it gets a little weird... the lines you see in the line-drawing around the collar, down the front where the buttons are, and at the bottom hem and the bottom of the sleeves are actually separate pattern pieces. (In another view of the pattern, they're made in a contrasting fabric, which is why it's done this way.) If you're using this pattern, you have to be sure to at least include them in the sleeves and on the front facing, or the sleeves'll be too short and the front won't meet the way it's supposed to. Having said that, I'll mention that we left off the extra facing at the collar to give more room to fit the PK vest I made underneath. We attatched the pattern pieces together before cutting, again.
--It gets extra weird here. This jacket buckles instead of buttoning, so the front facings don't overlap like they would with a button closure. So, we cut the front facing pattern piece in half and attatched it to the front panel pattern so it would meet up evenly.
--So once all that's done, we measured where it should go and cut a horizontal line across the front and back pattern pieces so we could cut the leather top out separately. (tip: Cut the lining first while it's still all in one piece.)
--We split the sleeve pattern piece down the middle from where the high point of the shoulder would be down to the wrist; again, piece the pattern together (I like scotch tape) and cut it out this way so the sleeve's still in two pieces.


Materials:
black vinyl with cloth backing, approx. 1 1/2 yds.
bottomweight black corduroy, approx. 2 yds.
black acetate lining, approx 3 yds.
black 1' webbing, approx. 3 yards
silver toggle clasps, 4
leather needles
(don't do this! try heavy fabric/denim needles; leather needles will punch through and tear the fabric if it doesn't go smoothly through your machine-- and for that reason, I'd also recommend a silicone-based lubricant for the fabric-- yes, they make it for sewing, too. *g*)
approximate cost: $45 US


Construction:
I'm sorry I don't have in-progress photos; we were in a hurry to get it done. I'll try to be clear!


--Join the vinyl back (which is cut out in two pieces that should be sewed in the middle before you do this) to the back section of the corduroy, which is cut in one piece on the fold.
--Fold and pin the remnant (the unfinished edges on the outside of your stitching line) on the wrong side towards the vinyl and topstitch on top of the vinyl to make that nifty little line that looks like piping. Be careful pinning on the right side of your vinyl-- big pin holes can sometimes be hard to get rid of.
--Join each vinyl front to its corresponding corduroy front and topstitch in the same way.
--Attatch the webbing strips to the front pieces, starting about half an inch from the leather/corduroy joining line, and following intervals to the waist... ours ended up being about 1 1/2" between each strap. I used a double line of topstitching at top and bottom to tack them down, and then they were sewn into the side seam. Leave a little bit of room near the front opening so you can hand-stitch the buckles.
--You can pretty much follow the pattern instructions after this point. Join the fronts to the back at the side and shoulder seams, and stitch the lining together at the side and shoulder seams.
-- Pin the extra webbing out of the way while you stitch the lining to the coat and sew it up around all the edges, except for the sleeve openings and a small opening (easiest in the bottom hem) for turning it right side out. Turn it right side out.
--Topstitch the collar and down the front through all layers, including the lining (this will help the lining stay flat on the inside as well and not show)
--Sew the sleeves together and topstitch down the middle, put the sleeve lining together, and attatch the lining to the inside of the sleeve.
--Attatch the sleeves to the coat by machine-sewing vinyl to vinyl, turn right side out, and slip-stitch the lining closed.
--Hem the bottom and remember to close the hole you used to turn the coat inside out.
--Unpin the webbing and attatch buckles, measuring carefully to make sure the front pieces line up together.
--Try it on and point your imaginary pulse pistol at the mirror, you're done!


questions/comments/other dren, send to gothtypegirl-at-hotmail-dot-com