|~|Here is how I built my homemade Coffee Table out of Garage Sell Parts and Hardware pieces|~|
I wish I had taken pics as I had built the table but I did it in 1 morning as I had only a small window of time to complete it. During the rush I forgot to take any pictures.
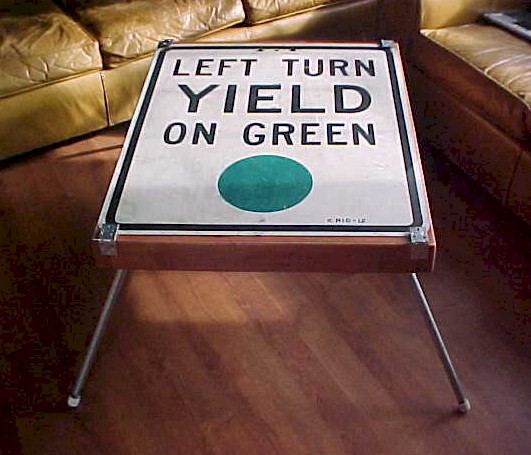
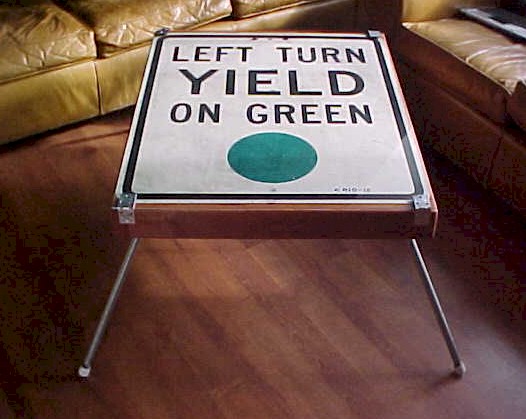
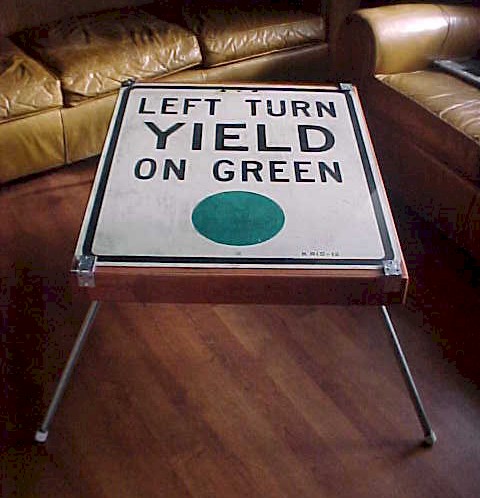
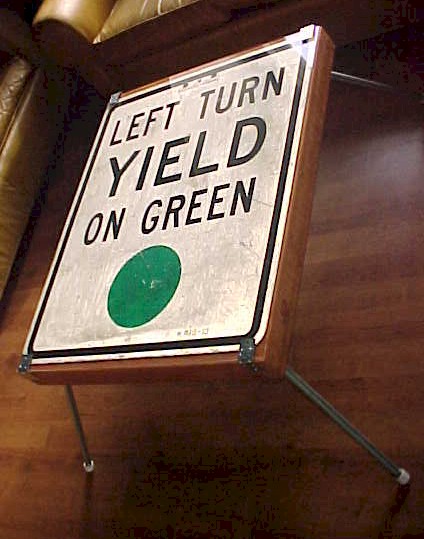
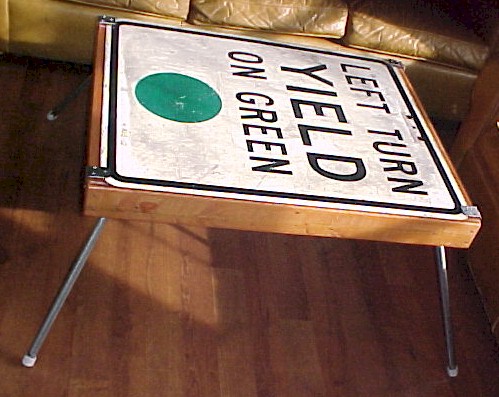
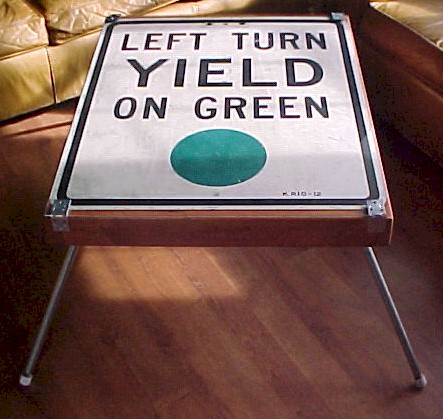
The inspiration came when I bought about 20 or so old road signs at a garage sell for $20. An hour or so later I bought a nice piece of plate glass for $1. The thought occurred to me that I could make a table out of one of the road signs and use the plate glass as a smooth top allowing you could still see the sign. A-LA ReadyMade Magazine. It is a great Mag and well worth the subscription. My wife and I are big Garage Sellers so I designed the table in my head while going to the last Garage Sales of the day.
I actually wanted to use a different sign that said to slow down for the Bus Stop and had a cool pictogram of a city bus. Problem was the sign was bigger than my piece of glass. I settled on my yield sign as it was close in size to the glass I already owned. I wanted to keep the project affordable. I am looking out for a larger piece of glass as I would like to make a Kitchen Table out of said Bus Stop sign.
Part of the Beauty of the table is the fact that the sign is used. If I had used a new sign or one of those tin reproductions it would not have the same character. I don't know what it is maybe the Patina of 1000s of Rain storms, Snowy Nights and Hot days. It just looks far better than an expensive store bought table. When you build something yourself it feels better. When you build something yourself with salvaged parts that may end up in the dump or simply wasting away, IT IS BETTER.
The cost of the table was around $48 which was actually fairly expensive considering I got the Glass for $1, the Sign for $1 and used scrap 2x4s for the wood stock.
Big Costs were about....
$3.74 x 4 for the Threaded 18" Pipe I used for legs.
$3.50 x 4 for the Threaded Flanges I used to mount the legs
$0.60 x 4 for the Plastic Caps I used to cap the pipes so they would not mar the floor.
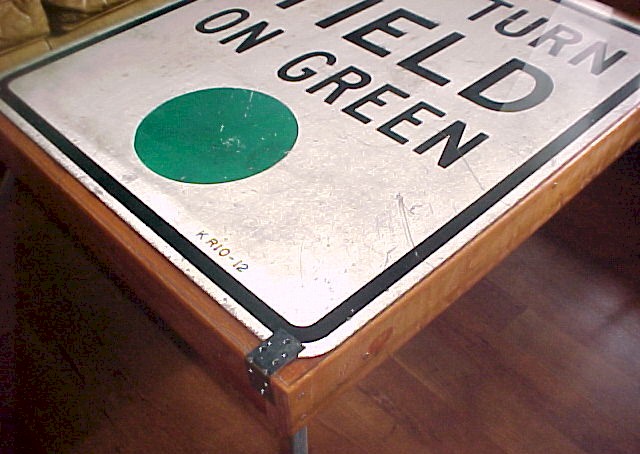
$3.46 x 4 for the Metal L Brackets that I used to mount the Glass Top to the table.
$4.87 for the Rubber Pads I put on the underside of the L brackets so the glass would not slide and so the glass would be protected from the metal L Brackets.
The Table is ~30.5" by 37.75" this is within .25" of the size of the glass I had. I wanted the table to be only slightly larger than the glass as a way to have a protective border and I felt it was visually pleasing. The sign is ~30" x 36" I built a frame with 2x4s with a bracing 2x4 in the middle to support the sign and glass if heavier objects were placed on the table. The L Brackets with the rubber pads were screwed in on each corner to brace the glass. The frame of the table could not get any simpler.
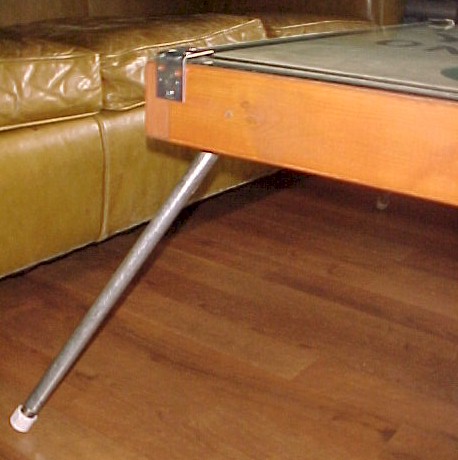
The hardest part of the project were the legs. I needed a platform to mount the flanges. I wanted the legs to slant as it was more aesthetically pleasing in my opinion. I Cut two 45 degree angles with about a 1.5" gap on the short side between them. Then I cut about a 18 degree slant on the edges. ( I wished I has made the angle less steep maybe 14 degrees as my only regret with the project is I wished the legs jutted out slightly less. With a smaller angle they would not jut out as much. Once I had the leg mount cut the way I liked it. The other 3 were simple I simply used the original as a template and cut 3 more exactly the same.
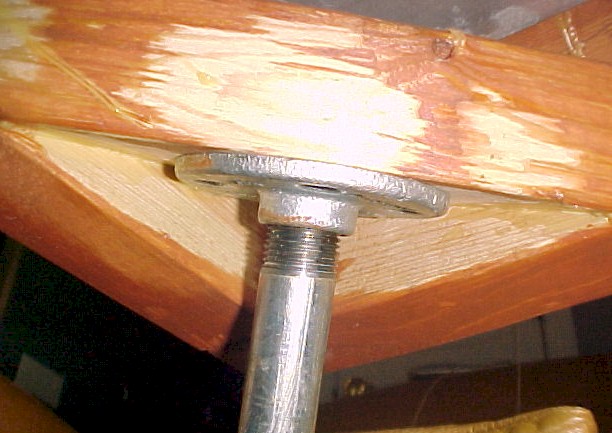
I used deck screws to screw the whole table together and put the leg foundations in each corner made the measurement where I wanted them and screwed them in with deck screws. Once I mounted the first I made duplicate measurements and markings in each corner screwed the deck screws till they barely poked through to the other side. This allowed me to position the slanted blanks before screwing them down tight. Once I had the corners all assembled I mounted the pipe flanges with drywall screws as I had them lying around they were not visible and about the right size. I then wood glued all of the inside gaps to make the table strong. After the wood glue dried I stained it to look similar to the floor in my house. I love the table and it is strong, I have had to chastise my kids on a few occasions to not sit on it. My youngest is around 30Lbs and I have caught her standing on the center of the table. The table looks better in person than with the pictures IMO
Visit my Power Wheels Hack Page
My Wii wireless Sensor Bar Hack
Special Thanks to My pops he doesn't know it but I am using his webspace. THANKS
Jay Hamilton